Powered By Blogger

Sunday, January 30, 2011

Look Who I Met at the Quilt Show!


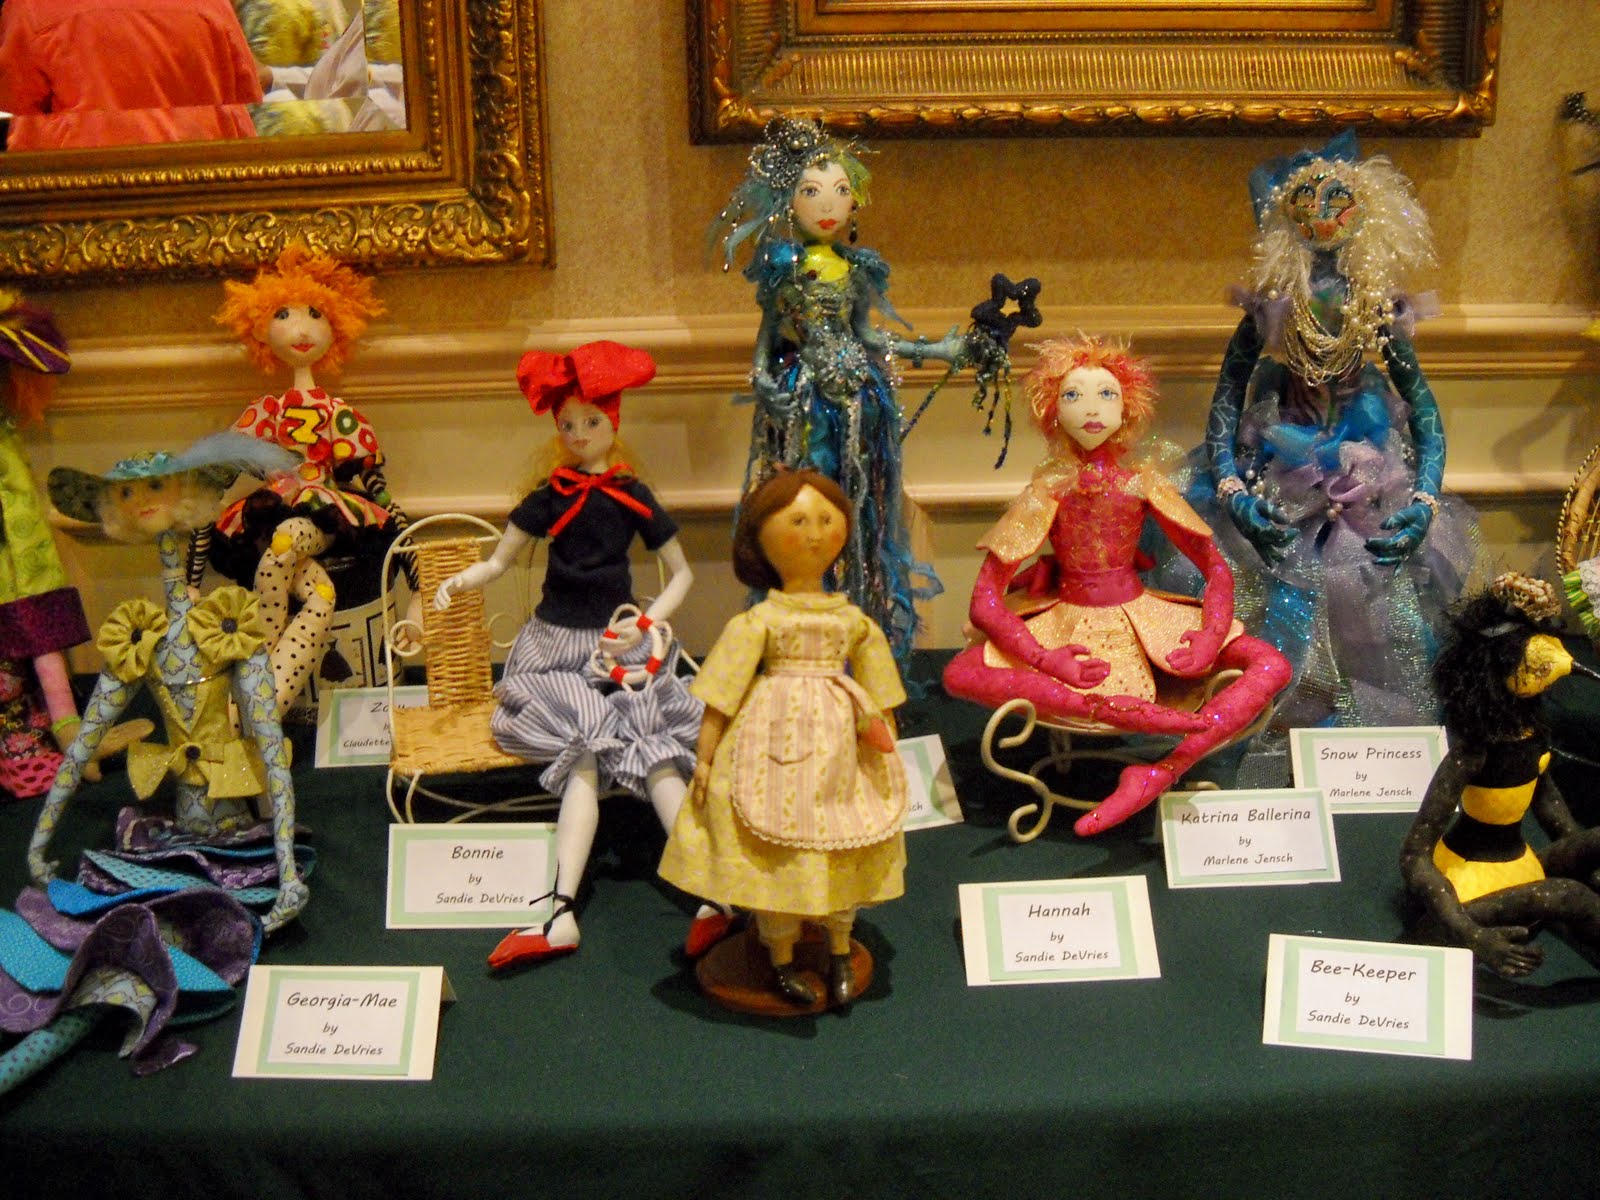
Aren't they lovely? The Quilting Guild of The Villages in Florida just held their bi-annual Showcase of Quilts (that's every other year, right? I get that mixed up.). The group has 11 chapters with more than 600 members, so they put on a big and very well-attended quilt show. Lots of wonderful quilts, plenty of vendors, and more.

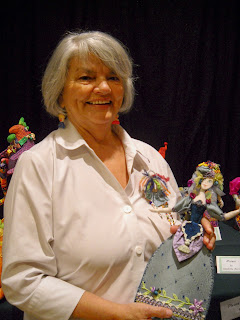
This year the "more" was this special display. Long tables were just filled with the work of a small group of talented doll artists. I had the pleasure of talking with Claudette Morrow, below, who has been making dolls for three years. But just look how accomplished she is! Several of the dolls that especially caught my eye were ones that she made. The display was magnificent. I can just imagine the stash of embellishments and fancy fabrics these creative women have in their sewing rooms.


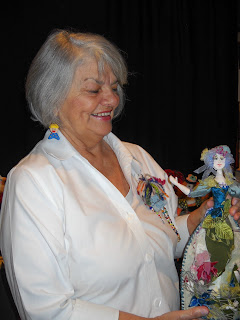
Claudette made "Miriam", a two-sided Fashion Doll, using a pattern by doll artist Barbara Willis. Just look at all the wonderful stitching and embellishments... and this is just side one. The other side is shown below along with Claudette's version of the "Picasso" doll. Get-togethers of this group must be quite lively and fun-filled!


Thursday, January 27, 2011

Don't You Just Love to Sew?


Me, too. That's why this nostalgic vintage image appealed to me so much. It's one of the free images from the Clearly Vintage blog (a June, 2010 post). This little girl is so absorbed in her embroidery. She reminded me a little bit of me. Embroidery was the first kind of hand work I learned when I was about 9 or 10 years old. Growing up in a very small, rural village meant that our local five-and-dime store, Newberry's, was the best source of sewing supplies. I remember the large wooden counters with small compartments in which the floss was displayed by color. What a wonderful array!


So I had to use this image in some of the notecards I made while taking part in vintage notecard swap at Creative Swaps. These were not among the ones I sent for the swap though. I just couldn't stop making the cards, so I was an overachiever, and made these little notecards to stay home with me for now.


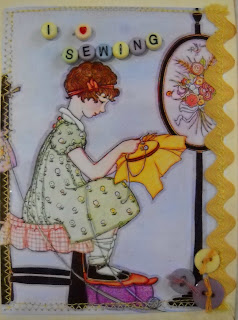
I used a variety of techniques and materials in making the cards such as bobbin sewing with metallic thread, die cutting, pen-stitching, and more. Great fun, and I'm sure this little girl will show up in more projects at some point.

Saturday, January 22, 2011

Not So Liberated Quilt Blocks


I've admired these blocks on various blogs, and been wanting to make some myself. Some sources call them "Sticks" (as in the book "Freddy & Gwen Collaborate Again"). Others call them "insertion strip blocks". At any rate, it seemed a simple enough slice-and-stitch proposal.


But I forgot something. If you want the second insertion strip to be visually aligned from one side of the first strip to the other within the block (and I do), then the piecing becomes a bit trickier. You can see four blocks looking the way I want them to in the photo below. That's because they were the last blocks sewn.

The first block I pieced was way off kilter. Uh oh! Deciding I could not accept that look in the blocks, I knew I needed to refine my technique. And because the seams fall at various angles within the block, no two blocks were alike. So my approach to sewing was to just jockey the pieces around, pinning and eyeballing, flipping them right side up to check, until they "looked right". And little by little, they got more "right". Right, by defnintion then, is "inside my comfort zone". I've seen quilts made from insertion strip blocks that are randomly joined. And I like them. I'm just not quite there in my blocks at this point. I don't mind at all that the strips won't line up at the edges of the blocks when set together. That's a good part of the plan. But inside the blocks? Another story.


You can see in this photo of four blocks how "wrong" looks from my perspective. But now that I study the photo, I think I can include these in the quilt, and be okay with it. I'm warming up to these blocks! They certainly become easier and quicker to piece when they are more random. Yeah... they'll be fine.

Thursday, January 13, 2011

Hi, Ho, It's Off to the Fair...


It's showtime in Florida... quilt show time that is. The calendar is full with quilt show weekends from now until late spring. One in February is the exhibition at the Florida State Fair held in Tampa, Feb. 10-21. One of the exhibit categories is needlework, so I decided to send in some entries this year. These are the items getting ready to travel. The Black-Eyed Susan quilt above is one I made while learning the thread-painting technique with Ann Fahl's book "Coloring With Thread". And you've seen the others on this blog already- the Symphony quilt, Coffee Break quilt, and Old World Santa (which are referred to in some areas as "Bullet Santas" as I learned from one of the comments).

And guess who was helping in the sewing room?? Lily has settled in nicely since her arrival two weeks ago. As you can see, she is a stealth cat who likes to hide and make her move when least expected! She's very energetic and entertaining.


Thursday, January 6, 2011

Paper and Piecing and Trims, Oh My!


The cards shown here are for a vintage notecard project on Creative Lenna's site, Creative Swaps. I was so happy to find her site which, for a modest fee, offers both instruction and the opportunity to swap creatively crafted items. In mid-December Lenna began this notecard swap, and it's still open for enrollment if you are interested. There are nearly 40 participants so far, and each of us will make three vintage-style notecards with envelopes. These will be sent to Lenna by the deadline date, and she'll trade them among participants. Then we'll each receive back three notecards made by our fellow participants. In addition to the instruction, Lenna has also provided some vintage images to download and use as we wish.The cards below include one of her images used in different ways.


Although this is the first time I've done anything like this, I dove right in and could not stop making the cards! As I'd be working on one, ideas for three more would be swirling in my mind. Or I'd trim something off one design, and immediately think of how that small piece could be used in another. Because I was cooking right along, I made lots more than the required three. But I needed the practice and my enthusiasm was in high gear. And Lenna was way ahead of me because she gave the option of swapping 6 sets if we like. Now I just need to pick the six.

I seem drawn to images of ladies in hats... so quite a few of the cards I made feature the lovely portrait shown at the beginning of this post. She looks so pensive. And the hat put me in mind of the costumes in "My Fair Lady". Imagine this hat and a windy day! The image is offered for use in artwork projects on the Clearly Vintage site. I learned that there are lots of free images available to download and use, giving credit to the site.


So now, in addition to fabrics and threads, I have paper scraps all over the floor. But those laces, buttons, and embellishments I've been saving for a long time are now seeing the light of day, and finding a home in these notecards. A busy time gluing and stitching and beading. Messy (see below), but great fun! Stitching on paper is fun, too. There are many more cards to show you, coming soon.