Wednesday, December 19, 2018
DIY Fabric for Christmas...
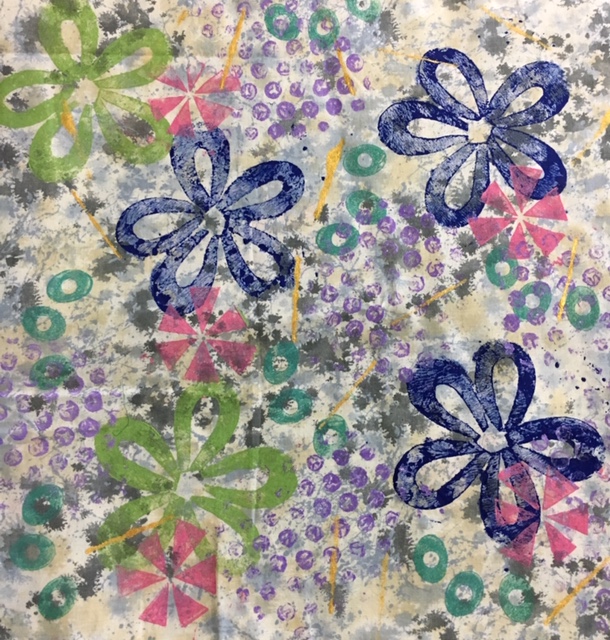
What?? There isn't enough fabric in my stash already? Well, there really is, but that doesn't stop me. Our Fiber Art Bee learned a number of surface design techniques during 2018, so it was only natural that we would apply them in our annual Christmas exchange. This year it was 12" squares (or so- we're not sticklers for rules) of fabric we stamped ourselves using found objects and handmade foam stamps. My squares began with rust-dyed fabric, as seen above, or a print from my stash that needed something more.
I made sets of two squares from three different fabrics. We were to make 6 squares, keep one, and swap the rest. This sample was a nondescript light print that soon became light and lively. I stamped with two handmade foam flower stamps, pool cover plastic (better than bubble wrap, I learned in our work sessions, because it is firmer and doesn't deflate), a hotel key card, and corn pad cushions. They make the neatest small ovals and retain their shape while stamping with craft or fabric paint.
This is the dark version of the print above. It almost looked like camo, but it didn't stay that way. All of my squares received the same treatment, but the paint colors changed to keep them visible and contrasting with the background. It was an absorbing project. After show and tell, where we learned how everyone's fabrics were stamped, the anticipation grew. Two of our members retired to another room during the Christmas party and randomly sorted 5 different swap fabrics into numbered piles. We drew numbers and were matched up with our stack of wonderful new fabrics.
I have plans for this piece already. It's done with cardboard tubes in various sizes and bubble wrap on a rayon blend. Very intense!
Gears, foam spirals, stars, cardboard tubes and more went into this piece. Wish I could recall what made that pretty pink waffle grid.
Lovely colors on this one, and Ginkgo leaves for one of the stamps.
This is a two-fer. Bubble plastic was stamped on top of a layer of tulle over cotton. We can use as is- a two-layer piece, or peel up the tulle which has sparkle and a subtle layer of color dots to use on its own.
Lots of spots! This began with white-on-white polka-dot fabric, and the theme continued. You might think this is the star of the show, but no... look...
If we got this one in our swap pile, we got a whole collection titled Whoooooo. There's a strip stamped with a thread spool end. AND this beautiful owl stamped on black. Such a nice detailed image. That's one area where I need to improve- I often get a partial image. But I'm learning aids to fix that like using batting under the fabric or ironing freezer paper on the back. What will become of these? I can only invite you to stay tuned, because I'm not sure myself.... YET. It's quite delightful to contemplate.
Monday, December 3, 2018
Visions of Sugarplums...
With Christmas approaching, I knew it was time to make a holiday charm necklace. Half the fun in making these is hunting and gathering all the bits and pieces that go into the design.
It began with making yo yos, then adding beads, pearls and sparkly things to each one. I have one of the Clover yo yo makers, and used it to keep the yo yos a consistent size. I'm a gadget quilter, but when these yo yo makers first became available, I pooh-poohed them. "After all, who can't make a yo yo?", I thought, "They're so simple." But I tried one and quickly altered my thinking. They make the task so easy, quick, and they yield same-sized yo yos. So I now own several sizes! Lesson learned- don't be quick to judge and dismiss.
Another fun addition is the button stack charm with a pearl dangle. The small stoppered bottle is filled with star glitter confetti, and the clear pink vintage dangle is an old jewelry rescue.
Idle hands are not my usual mode, so each evening I'd set up a tv tray with tools and doo-dads and get to work preparing items to use for charms. The little candy canes, pink bulbs, gum drops, and glitter stars are from small packages of mini-tree ornaments from Hobby Lobby. They just needed jump rings to get them ready.
Hobby Lobby also sold a bag of styrofoam "beads" that are used to fill clear glass containers for home decor. But they are lightweight and resemble snowball confections. I was able to pierce them, add sparkly things and turn them into charms.
The deep pink vintage button at the far upper right has hung around the button jar for many years and finally found a home in this necklace.
Here is some of the detritus of making the charms: more yo yos for another project, beads, eye pins, E6000 glue, tiny pearls, beading thread and more. Aren't those angel beads the cutest? Now to sort and put it all away until the next necklace wants to appear. The necklaces are fun and easy to make. My biggest challenge is kitten Iggy who is entranced by every item in my sewing room. Can you tell that trouble is brewing in the photo below? He's a climber and is resting on the work table just waiting... for something... anything, really.
Iggy is a Sugarplum of a different sort! And he's the reason we have not yet put up a tree this year.
Our local library has a lovely tree, however, filled with sugarplums. Merry Christmas!
Sunday, November 18, 2018
Very Vintage, Very Fun...
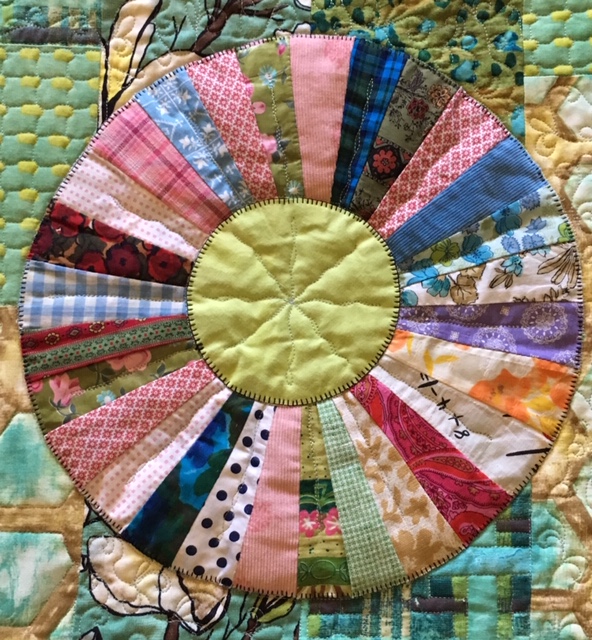
Old quilt blocks and orphan blocks left over from other projects hold a great appeal for me. And I'm a big fan of the traditional Dresden Plate block. This collection of stray blocks was just waiting to be used together in a quilt. I'd get them out from time to time, ponder what to do with them, and then put them away. That is, until I pulled out the lively pieced background that was all done and waiting to be used in a project. The background and the blocks all landed on the sewing room floor at the same time, and we began to play! "Dancing Dresdens" is the result. It's pretty wild, but somehow all the elements work together in a happy, happy quilt.
A friend who was moving, gave me a selection of these old Dresden blocks made by a family member. They contain everything from the usual quilting cottons, to corduroy, to shiny chintz and home dec fabrics. I made a quilt from most of her blocks and gifted it back to her and her family. But this lone block was left.
When reproduction fabrics first became popular, I bought some small pieces and made several blocks with them. Other blocks in the quilt were ones I pieced to try out a new method for making Dresdens, or were on the quilt guild's "freebie" table. So there's quite an assortment, including some batik pieces. But somehow they all work.
I sent the piece to longarm quilter Debra Johnston who was up for the challenge. She wanted to be careful in stitching the older blocks due to their fragility. I really love what she did to this background fabric- it resembles a basketweave. All in all, I'm happy with Dancing Dresdens and its cheerful nod to the past.
As you can see, old quilt blocks either find me, or I find them. The wonderful hexagon blocks were on the freebie table just waiting to come home with me. The others were in a bundle of old blocks sold together for less than $15. Look! There's another Dresden in there. What will they become.... I wonder.
Coincidentally, our guild had a speaker on the subject of vintage quilts this week. Quilt historian Kathy Metalica Cray brought many vintage quilts and pieces to share with us. And she told interesting stories about the quiltmakers, when information was known. She encouraged us to document quilts because we all enjoy the stories, and need to pass along information about our quilts. I think this star quilt fragment would have quite a story if we could know the quilter. I'm sure I'd like her!
Kathy's interest is in collecting and preserving old quilts, but she also loves to combine blocks from her extensive collection to make lovely pieces like this one. Only the setting triangles are cut from current fabrics (her own reproduction designs for Windham Fabrics) and they unify the vintage blocks beautifully.
Take care of your old quilts, and document as much as you are able. I intend to be better about doing so. Some of my quilts are still waiting for labels with the barest of info on them. I need to step up the game!
Friday, November 2, 2018
Making Faces...
Meet "Eve", my entry in a recent quilt challenge. The challenge was Black & White Plus One Color. Gold was my choice, and I had an assortment of black & white print scraps. Eve was lots of fun to create, using snippets and arranging her stylish hair. I used fusible Wonder Under on the prints, then free-motion quilting to secure the raw edges. And there's a story that goes with the small black & white print seen in the left and top borders. Read on.
I began Eve over the summer, and in August had cataract surgery. Once my eyes were a matched set, I continued working on the quilt. Colors and vision had a wonderful new clarity. But imagine my surprise when I noticed that the border fabric noted above was not a black & white print after all. There is a small gold ring around those tiny white dots. I was unable to discern it when I had cataracts. But with corrected vision- well, there it was! Fortunately I had chosen gold as my "one other color" so it all worked out. I'm thinking of taking a sample of the fabric to my eye doctor- he can use it to test when patients are ready for cataract surgery! I pieced this big eye to put on the quilt back to remind me of the experience.
This book by Melissa Averinos was a great guide for designing Eve. She has some wonderful examples in the book.
And speaking of books, here is a little heart journal I made with a journal group I belong to. It began as a humble cereal box. With a little scrapbook paper and some embellishment, it became a loose-page journal to which I can add artwork.
The first thing I thought it needed was a pretty girl's face. This sketch with watercolor is one I made in an online class with artist Toni Burt called Flower Power. I love her whimsical style. A little stitching added around the edges, and she's ready to put in the journal.
Thursday, October 25, 2018
A Bit of Halloween Humor....
..and a new Halloween necklace, too. I'm not usually a Halloween aficionado. But this year, after making the charm necklace shown in my last post, I decided a themed necklace was in order. I found lots of small bits that lent themselves to it, like the little ghosts and beaded yo yos. And I purchased a few charms from a bead supplier to add in. I need to get a larger jewelry form- this one make the necklace look gigantic. It doesn't really ride that far out on my shoulders! That WOULD be scary.
You can see a few more of the charms in this close-up. There's a message-in-a-bottle charm from the class I took. It's says "Best Day Ever- 2018- Goatfeathers Studio". I've told our instructors that their classes are quite often the best day ever- so much fun. The little potion bottle was also from the class but did not wind up on the class project. It fits here very nicely. I've been playing with making Shrinky Dinks charms, and you can see the eye on one of them peeking out. She does not look very happy to see us.
I also added beaded felt balls, witch's shoes, and more Shrinky Dinks. The face is one made from fabric featuring the Ghastlies- a delightfully creepy family in the mode of the Addams Family. I was able to transfer the face onto the shrink plastic, bake it, and wind up with a perfectly Ghastlie little charm for my necklace. These are such fun to create. Of course, Christmas is coming! I'm already thinking about a third necklace for that holiday.
"Got catnip?", these two trick or treating kittens want to know. I saw this project idea at Rainbow's End quilt shop, Dunedin, FL. The shop was selling the paper image sewn onto theme fabric at a recent quilt show for just a couple of dollars. I bought two, and added further embellishments. Then the piece is mounted on canvas board and displayed on a plate rack. Their creative idea, my embellishing. But I can certainly make my own with images for other holidays and events, and plan to.
This one made me laugh out loud- "Surprise me," the pumpkin in a barber chair says trustingly to the carving knife! I added a sparkly yo yo, rick rack, ribbon, and a fiber bundle to this one.
Throw in a few pumpkins and an autumn garland, and maybe I'm more of a Happy Halloween person than I thought!
Saturday, October 6, 2018
A Bit of Southern Charm...
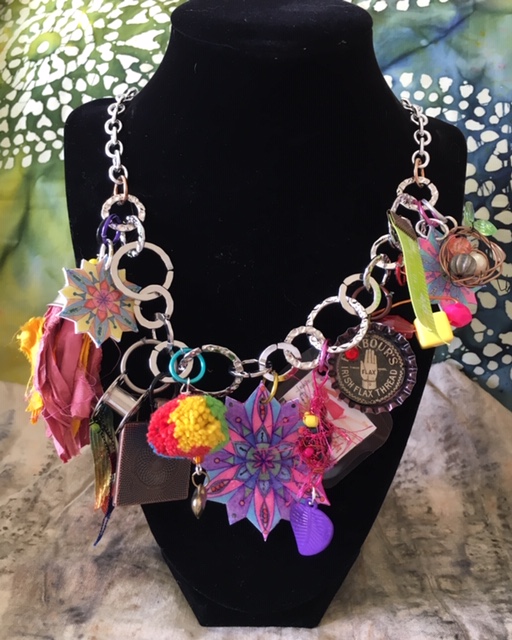
DIY projects are just the ticket in my book! So when I got a chance to take a class in making charm jewelry, I jumped right in. This charm-loaded necklace was the result, and I'm so happy with it!
It has a wide assortment of charms, 14 of which we learned to make in the class. This close-up shows a bottle cap charm, one made from a bit of tape measure, a wrapped fiber bead, a wire bird's nest complete with eggs, and two of my mandala drawings turned into shrink plastic charms.
And here you can see a sewing machine bobbin turned charm, a pom pom charm, and just behind the mandala is a silver thimble with ribbon extensions. We were provided with the chain necklace to which we added our charms.
Our instructors, Celeste and Merri of Goatfeathers Studio, suggested that we assemble the necklace by placing it on a jewelry display form. We could then design and balance out our charm arrangement in a pleasing way. You can see some of their work along with student work at the link above.
Here's what goes into the charm making- a table full of bits, pieces, and tools. We learned Jump Rings 101, and how to form tidy loops with wire to attach the charms.
We needed wire nippers, flat and needle-nose pliers along with a way to keep our charms in order. We were at about 11 charms in the photo above when it was time to break for lunch.
And what a lunch! Our instructors were also hostesses/chefs, and provided a lovely chicken on salad meal. They have such flair! That spooky silver hand held my napkin. The entire feast was presented with Halloween table accents.
Merri and Celeste had more than a dozen of their necklaces on display to spark our creativity. They've been busy making, and have taught this class several times to various sewing and fiber groups, so have lots of samples.

The metal tag and wooden spool were given to us to create more charms for future jewelry. My plan is to make more shrink plastic charms to include as well. I missed the entire shrink plastic decade, so am catching up now! There is a bit of a learning curve to achieve the results I'm aiming for, but more on that in another post.
I loved the bird's nest so much, I made another to have ready. The other five charms were part of our lesson and may be part of my class project eventually. But I ran out of right-size jump rings to attach them. There may be a Halloween necklace in the works, and perhaps a Christmas one, too. While working to complete this necklace, several others were inventing themselves in my mind. One thing I've learned is that I have many interests, and every one of them requires its own set of supplies and tools. No wonder I'm always trying to tame the chaos in the sewing room!
Sunday, September 16, 2018
Let's Make Some Noise...
Earlier in the summer, I took part in a 30-day sketchbook event with artist Karen Abend in which I stitched a small vintage-look fiber collage (see some others at the link) each day. I knew my goal was to include many of them together in a journal, and at last, I've compiled the collages and completed the journal. It's awaiting a title, so make a suggestion in the comments if you have an idea. This project is another "crinkle" book, meaning the pages have a wonderfully crackly sound as they are turned. A noisy journal!
And the reason for the sound is that the pages are made using recycled plastic liners from cereal boxes. I learned the method from Kristen Robinson, and showed my first journal in this blog post last March. Interesting bits of paper, lace, and trim are encased between two sheets of the plastic, covered with parchment paper, and briefly ironed to adhere them together- thus embedding objects.
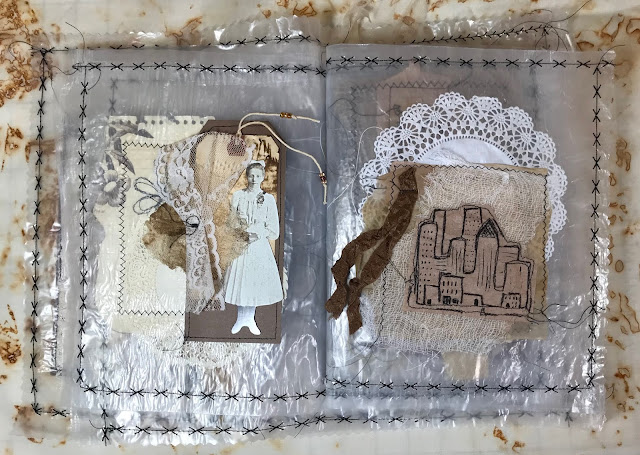
You can see the doily in this photo is embedded in the plastic. Then I stitched the collages on the fronts and backs of the pages. Some of the collages are made with free-motion stitching on paper, while others included used and dried tea bags, thread bits, and lots of other quirky things lying around in the sewing room!
This vintage girl photo is sewn to a tag with beads and faces a free-motion cityscape stitched on cheesecloth and a tea bag. Once all the collages were sewn in place, I stitched a line of decorative machine stitching around the edges, and bound them together. The book is lying on a lovely piece of rust-dyed fabric gifted to me by a quilting friend.
Burlap, sheet music, old postage stamps, buttons, even corrugated cardboard bits found their way into the pages. So the pages are very tactile and just invite a touch, but then they make the most satisfying sound to boot. What fun.
There is something so appealing to me about vintage photos. This wedding couple is a pair from one of Tim Holz's series of paper images you can purchase if you don't happen to have old photos of your own relatives. You might think this book put a dent in the large collection of found materials in the sewing room, but I can't see a discernible difference- there is lots more! Another book may be in order.
The back cover gives you a glimpse of images from the other pages inside along with the random threads embedded inside. Transparency is another bonus of using these recycled materials in bookmaking. So think "handmade crinkle book" before you toss out another cereal liner, and upcycle!
Subscribe to:
Posts (Atom)


