Powered By Blogger

Friday, December 27, 2019

Tying Up Loose Ends...


Wrapping up the year in my sewing room, there were a few finishing touches to add and projects to complete. This stitched heart made from necktie fabrics is one I showed previously, but I wanted to make it into a door hanger. So I sewed some split rings on each side at the top, and added a beaded wire hanger. It's now on display where I can see it.


I also kept making the leaf bowls shown earlier. I thought you might like to see them before they are shaped into the final form. These are the back sides cut from a single fabric. And you can see the free-motion stitched veins. The leaves are sewn flat, trimmed to shape and edge-stitched all around.


Each section of the leaf front is cut from a different fabric, fused in place, and then stitched.


Once stitching is completed, each one is steam pressed with an iron which makes it soft and pliable. Then it's pressed over the bottom of a medium size bowl, and another bowl placed on top to form it.


Once cool, the bowl holds its shape and hardens. I'm sure I'll be making lots more of these!


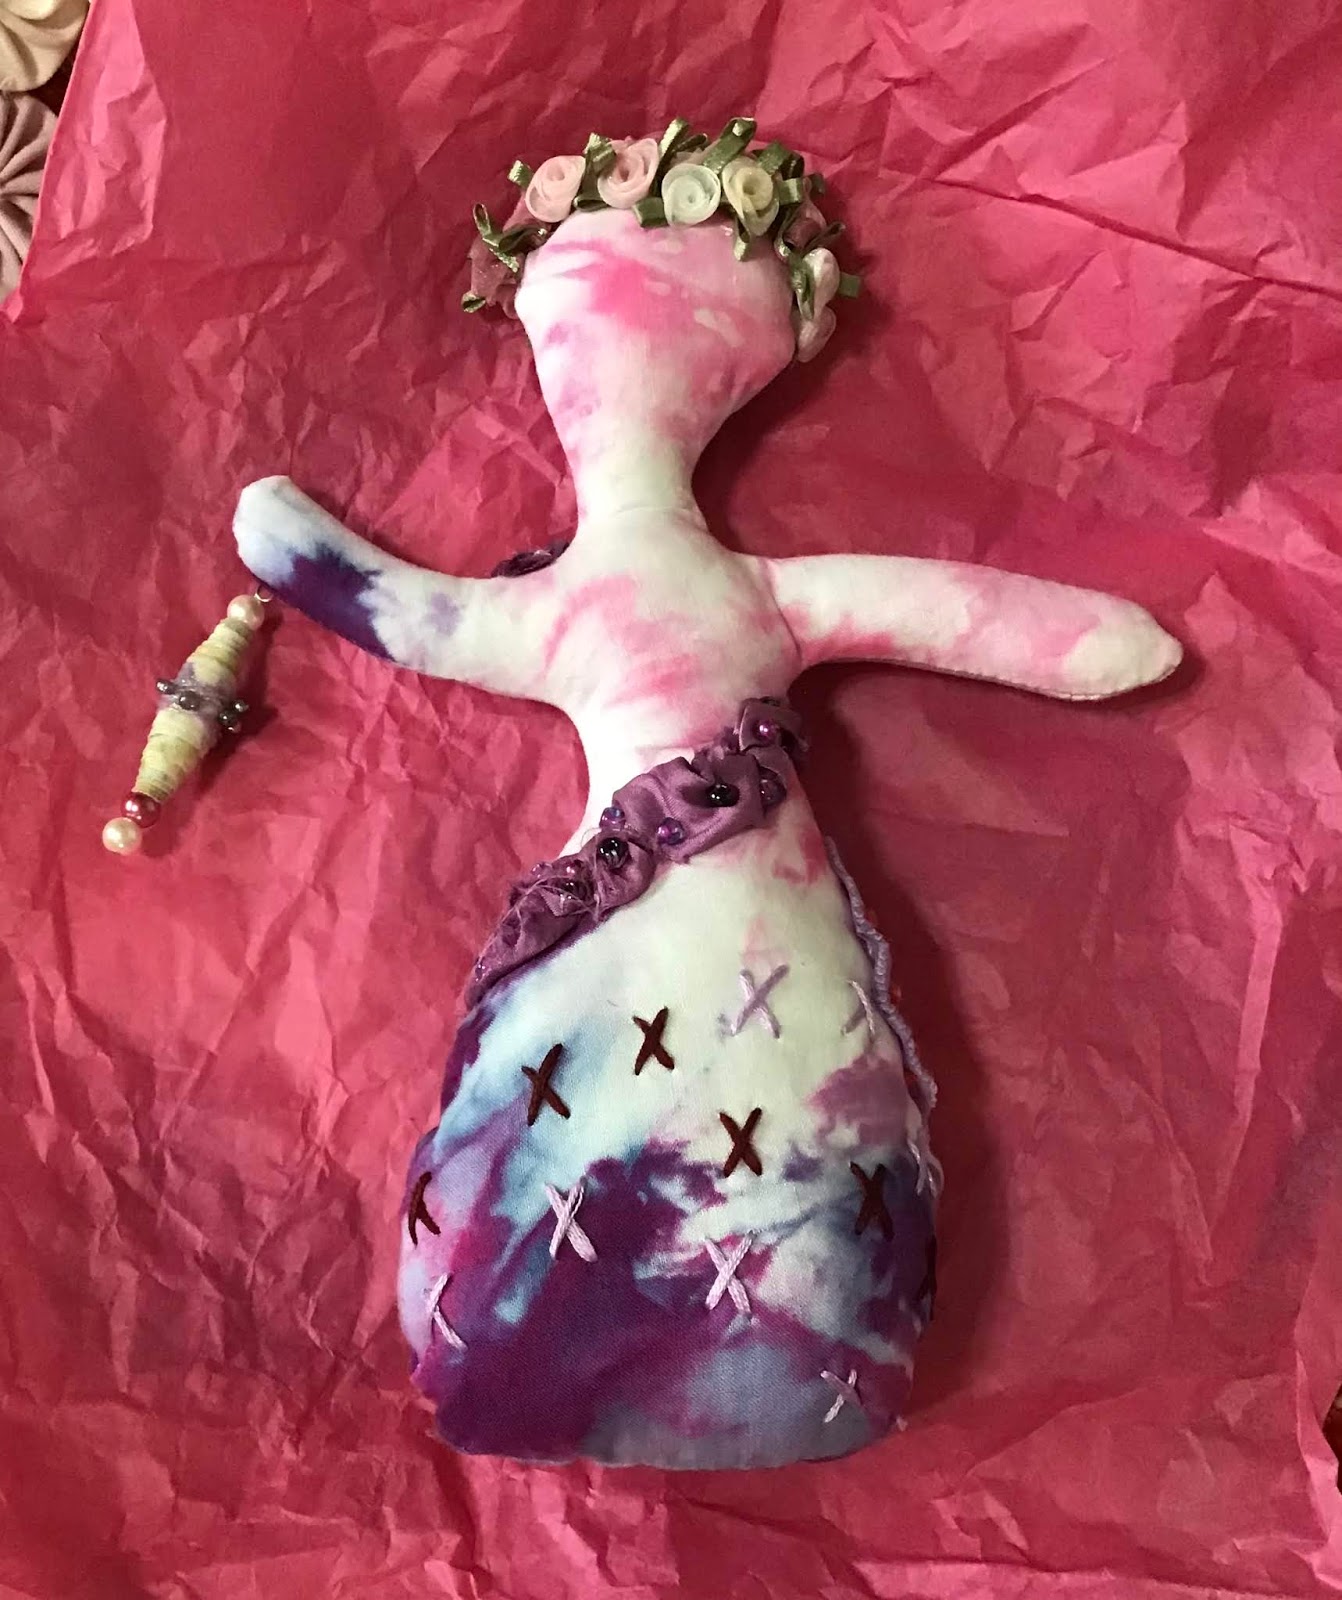
I also wanted to show more details of the whimsical Art Warrior Doll I got in our doll swap in Fiber Art Bee. She was made by Merri McKenzie and has all sorts of creative sayings and thoughts, front and back!


And she is holding a thimble charm in one hand along with the charm containing buttons you can just see in the photo above. I was told that those buttons hold a record of all of the creative ideas in the world. That's terrific because I, of course, want to make one of each! Now I have a reference. She's quite lovely. Here's to many more creative projects in 2020! Happy New Year to you.

Monday, December 23, 2019

Merry Christmas to All....


Merry Christmas! This vintage-style sewn Nativity set was gifted to me by a friend this year. She even made a cute fabric bag for storing it.


And the sewn-and-stuffed swan has donned a sparkly bow tie for the holidays.


Angels watch over all.


And our pets provide the holiday entertainment. Iggy was upside down with excitement about the tree and its ornaments.


One of his favorite places to hang out is on top of my car where he lays with his elbow hanging over the edge of the roof. We joke that he reminds us of a New York City cab driver- "Where to, lady? The meter's running." So our daughter Joanna found this perfect picture frame for our Christmas gift and put his photo inside. He makes us laugh a lot and now, so does this photo.

Thank you so much for reading and/or commenting on my blog posts. It means a lot to me. A healthy and happy 2020 to all!


Wednesday, December 18, 2019

Meet the Party Dolls...


Our Fiber Art Bee had a fun swap for our Christmas party this year. Each participant made a "spirit doll" to trade. This was after an interesting program on the topic presented by one of our members in the fall. This girl is one that I made to trade. She's fashioned from hand-dyed fabrics, lace, embroidery, beads, silk flowers, and a shrink plastic charm. I call her the Flower Girl.


And this is the doll I received in the swap. i just love her and she will join several other Art Warrior dolls I've made. I'll show some close-ups of the various elements in a future post since this is a photo-heavy post. Merri added many creative touches, front and back.


Our photo recorder took pictures of each doll with the recipient and maker. Mine was made by Merri McKenzie, right, who, with her sister Celeste Beck, taught classes on making these dolls. You can see three of the dolls I made in their classes here, and now the dolls have a little sister! Perfect! Merri also made her fascinator- so festive.


While making the Flower Girl, I also made a second so I could decide which one to swap. I get to keep the Pink Flower Girl, made from ice-dye fabric, trims, beads and embroidery. But she came along for show-and-tell. The dolls are very relaxing to make somehow.


This array of bags was on display while we ate our holiday meal and waited out the suspense of seeing what they contained.


There was such a wonderful variety of dolls. I drew my free-form doll pattern after seeing some of these embellished dolls on Pinterest. This is another one- a mermaid that is heavily embellished. Some members even got creative with the gift bags!


This is the colorfully stamped bag my doll arrived in.


I thought you might like to see the back of the doll as well- not as fancy, but still stitched and embellished.


Blog reader Elizabeth asked about a YoYo quilt I mentioned in a previous post. When taking the doll photos, I placed the vintage quilt in the photo in case others were unfamiliar with a YoYo quilt. They are made by cutting a circle of fabric (all sorts in this case, from silks to cottons to home dec fabric). The quilter stitches around the circle with a gathering stitch and then pulls the thread taut, drawing the edges to the center and forming a YoYo. These are then whipstitched together in rows, forming the quilt top. Of course some do not think of these as "quilts" since there is no batting or backing-rather they refer to them as coverlets.


Here's the back of the pink flower girl.


She, too is posing with the vintage YoYo quilt that was gifted to me.


Thursday, December 5, 2019

Downsizing in the Sewing Room....


Downsizing is not happening in the usual sense, though the sewing room benefits from a purge every now and again. This downsizing happens to be shrink plastic! While you may think "Shrinky Dinks" brand when you hear shrink plastic, there are actually other brands available- like Grafix and Shrinkets from Julie Haymaker. I know this important information because I recently presented a workshop for our Fiber Art Bee on using shrink plastic in fun and creative ways. I'll share some of the basics here, in case you're interested in trying it. Shrink plastic is a crafting medium made by stretching plastic into thin sheets that will shrink down by 60% or more when heated in a toaster oven, regular oven, or with a heat gun. It happens so fast, you'll need to be watching! You can buy shrink plastic in assorted styles (clear, opaque), colors (black, gold, white, pastels), and finishes (clear, sanded). And you can buy sheets of ink-jet printable shrink plastic to run through your printer for custom images. Use ONLY an ink-jet printer though- laser printers use heat that can melt the plastic inside the printer. Nobody wants that! The flowers above are doodle images copied onto various types of shrink plastic. All but the pink one were colored with markers prior to cutting them out and baking (on a parchment paper or silicon lined baking tray at about 325 degrees for less than a minute). The pink flower was colored with Prisma colored pencils (suggested because they are softer). I'll explain about the murky look of the orange flower in a bit.


I may have become a bit caught up in (translation-obsessed with) the images of The Ghastlies found on some Alexander Henry fabric prints in my collection. I scanned and printed some of them on the shrink plastic, colored them, and shrunk them down to charm size. As you can see, this is a craft that can have varying results for many reasons. One variable is how much darkness is in the original image. Because colors intensify as they shrink, very dark colors can dominate the design. So use a light hand when adding color. Also, I was interested in finding a finish that would be clear and glossy to apply to the completed charm. I'm still on that quest. I've used Diamond Glaze and Glossy Accents with some success, along with clear nail polish. Some of the finishes can cause the colors to run or become cloudy, and that's what happened to the orange flower above. If you want to use the shrunken image as a charm, punch a hole in it with a 1/4" hole punch prior to baking. Or you can glue a bail on it once it's done to avoid the hole in the image. You may want to round the corners on shapes like these to avoid sharp edges and to help with some of the slight distortion of shapes that happens.


I'm not sure how it happened, but apparently I (and my now-grown children, too) missed the whole Shrinky Dink craft trend of the 1970s. But I'm certainly making up for lost time now! The button, mandalas, and sugar skull shown here were all printed on ink-jet shrink plastic, colored with pencils or markers, and baked. Coating the back with acrylic paint or permanent marker helps to make the color stand out a bit. I used white paint, though other colors will work, too. Copy-right free coloring images are good sources, or draw images yourself. The yellow flower was traced with a fine-tip black Sharpie, colored with colored pencils, cut out, and baked. One tip for this- draw the image on the smooth side of the plastic (easier on the pen nib) and color on the sanded side (it takes the color better and adds an illusion of depth). If the plastic is smooth on both sides, sand one side lightly with fine grit sandpaper. And again, you'll notice that most of these are simple shapes which helps to avoid sharp edges in the shrunken piece. The turquoise mandala is about as pointy as I'd go. Some crafters say that you can use recycled clear plastic that is marked with a number 6 as your shrink plastic. I did not have good results when I tried it though.


You can see some earlier Ghastlie girls I used in this charm necklace.


And some hand-drawn mandalas added to this one. Just a tip for heating the shrink plastic with a heat gun- hold the cut out image in place on a silicon mat with a craft stick because the forced air can blow the lightweight plastic off the work surface. And while it heats, each shrink plastic item will fold and curl in on itself in a way that makes you think it's not going to work. Be patient- it eventually flattens out when it's close to done. I used a pancake turner to remove each item from the lined baking tray, placed it on another parchment paper on the counter, and pressed down on it with a tile coaster for a few seconds just to flatten it fully. By the way, the utensils used are ones I keep for crafting use- not used for food. There you have it- more than you may ever have wanted to know about shrink plastic!