Powered By Blogger

Monday, January 28, 2013

More Than Meets the Eye...

I once heard a take-off on a familiar saying that kind of stuck with me when it cames to trying out new stitching methods. It goes like this: "Anything worth doing is worth doing badly." That was a little of how I felt getting into the creation of this small "Happy Villages" quilt. There are tons of mistakes, but still the process as a whole was worthwhile. It took some time as I cut, and glued, and netted, and stitched my way to completion of a fantasy town using the instructions in Karen Eckmeier's book. Making the village is quite a spontaneous and whimsical exercise. And the project built some new skills that will hopefully take me to more achitectural and landscape quilts.


Here's the instruction book I used. It's full of clear directions and inspiring ideas. You can see more of Karen's villages on her Quilted Lizard website here.


I was working on the project around Christmas, and it had me looking at Christmas cards in a new way. I kept several of them that had village scenes and have tucked them into the book. I could see this card serving as the inspiration for a wintry village. All in all, a fun project worth repeating!


Thursday, January 17, 2013

Sampler Quilt Top Ready...

This is the sampler quilt top from the 2012 free online Craftsy block-of-the-month. I told myself I was not permitted to sign up for the 2013 class unless I put these blocks together. Since I made only 15 of the 20 class blocks, I assembled the quilt top in five rows of three. However, this presented me with a slight problem. Generally long, skinny quilts are not my favorites. So I widened out the side border pieces, and narrowed the top and bottom ones. Because it's just a top at this point, it doesn't look as if it's hanging straight, but it is in square... at least I hope it is! Instructor Amy Gibson did a great job leading us through the various techniques for the blocks and quilt assembly. 


Part of the fun in quiltmaking is playing with the blocks to come up with a pleasing arrangement. The California Dreaming fabric line I chose for this project is so bright and bold that they all kind of worked wherever I put them. So high marks for bright... if you like bright! 


This photo shows the border in progress. I seem to be an incurable floor-quilter. Getting down there to work is not much of an issue, but getting back up is another story. But I'm so messy when I work, and I make piles of stuff all over the place. So there is no table big enough... it takes a floor.


And I just wanted to show this photo. I started the New Year with a lovely Yoga retreat held at this retreat center. Could you be anything less than peaceful here? Ahhh.....


Tuesday, January 1, 2013

Quilts DO Equal Love!

This quilt may be small, but it is chock full of new and fun techniques! I sure love it. I made it as the class project in "Fabric Fancification", a free online class offered by instructor Lauren Vlcek at The Quilt Show. We began by piecing the background, and then added fused elements along with embellishments in each of the small sections. The project calls for beading, couching, raw-edge applique, embroidered accents, decorative machine stitching, and even printing text on ribbon. I must say that Lauren made it all very easy and lots of fun to do. 


The project will serve as a little encyclopedia of embellishment techniques that I'm sure I'll use in upcoming quilts. Lauren made some of the hard-to-find items such as the small sequin flowers and beading thread available in a kit on her Etsy site. That worked nicely for me because it gave me just the right amount of each type of sequin for the project. I didn't have to shop around and wind up with excess items. Believe me, there are excess beads galore in my sewing room already! Thanks to Lauren and The Quilt Show, I'm geared up to use them rather than just collect and admire them. You can join The Quilt Show site for free, and Lauren's class is free, too.


Monday, December 24, 2012

Merry Christmas!

After winning a copy of Sew Embellished by Cheryl Lynch, I adapted one of her patterns to make this holiday wall hanging. It was also my entry for our quilt guild's "Star Challenge". Cheryl includes all of the instructions for making the quilted project, including the prairie points at the top and the "jewels" at the bottom. I'll be adding even more embellishments like bells, buttons and beads for next year, but I'm calling it done for this Christmas.

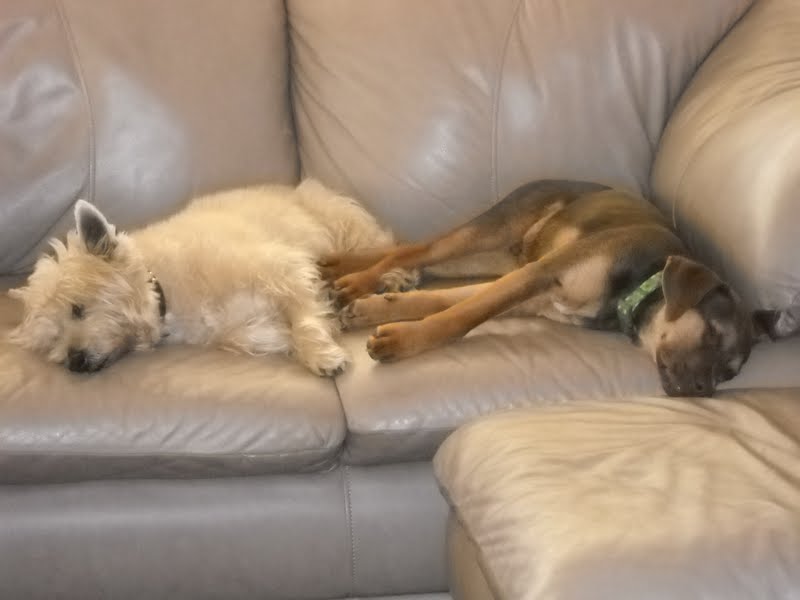
Peace on earth! This rare photo of Jesse permitting Scooter in his space for a winter nap was a surprise. Young Scooter is very respectful of 14 1/2-year old Jesse, who puts him in his place as needed. This is either a moment of good will, or else Jesse slept through Scooter climbing onto "his" sofa. Jesse is hard of hearing now and he sleeps deeply. Whatever the reason, it made us chuckle. Hoping you enjoy the holidays!


Friday, December 21, 2012

Party Dolls...

Dolled up and ready to party, these four girls sat under the Christmas tree at our recent holiday luncheon at the Citra Crafty Quilters gathering. After showing group members the doll in this post that I made for the prison crafting program, several of them wanted to make a donation doll, too. So we set aside two or three work sessions and got these dolls underway. From the left are Violet (who has her own sleeping bag to match her dress), Gloria, Scarlet, and Dotty. Some of the dolls will go to the local sheriff's department for use with children during domestic calls. There are several more dolls in the works, but these were completed in time for Christmas.

One fun aspect of these dolls was using less traditional materials to craft them, including prints and bright colors for the bodies and fancy yarn for the hair. Scarlet has painted features, felt shoes, lacey socks, and a fancy bit in her hair.


And Gloria has embroidered features which I think I prefer doing when making these dolls. They're great fun to make, and their personalities emerge as we go along. And their names do, too! It's almost as if they tell us what their names are. I'm sure there are many more dolls just waiting on my fabric shelves.


Monday, December 10, 2012

A Collaborative Quilt...

This completed quilt represents the work of lots of quilters and fiber artists, which makes it very special. When I shared with fellow blogger and quilt artist Robbie of Robbie's Paw Prints that I was volunteering in a women's prison crafting program, she wanted to support the women. She and her friends in the Fiber Arts Group in Michigan sent a huge box of donated supplies, among them pieces of unique hand-painted and dyed fabrics. I knew they needed to be used together in a quilt, so I cut and packaged pieces which were delivered to the prison. The women pieced the quilt top, and I then brought it out to another quilting friend, Claudia at Quiltworks of Orange Springs. She donated the longarm quilting, I added binding, and the quilt is ready to be donated to a local foster-care agency for teens. All of the women's work is done for charitable organizations, so they contribute to the community while they develop crafting and workplace skills. I could see a teenager really loving this quilt... it's one-of-a-kind, trendy, colorful.


Here's a close-up of Claudia's chosen quilting motif and some of the hand-painted fabrics. I showed the quilt to a woman who was herself incarcerated at one time. She summed up the project by saying the lesson to her in the quilt is that so many people were involved in completing it, and not one of them was looking for anything in return... just a true spirit of collaboration and generosity. Well said. With all those good vibes in it, I'm sure this quilt will be cherished by its new owner!

And look who wanted to say hello. Scooter has become healthy and is growing quickly. He doubled his weight from when he arrived in October, very young and thin and lost. You can see the changes in him in just those few weeks here. He's attending puppy school and is just a delightful pet. It's tough to get a photo of him as he's on the move so much.. I usually just capture a paw or the tip of a tail. But he sat nicely for this one.


Saturday, December 1, 2012

Bahamas Breeze Quilt Completed!

Well, the Bahamas Breeze quilt is completed now, and it's one that I quilted myself on my Bernina 440 QE. This year I've been trying to become more proficient at free-motion quilting, and I've had what I would call moderate success. I can manage small projects quite well, and enjoy quilting them. But larger pieces like this one (about twin size) are another story. I'm not a fan of my workmanship standards on large pieces. I chose to free-motion quilt spirals placed around the quilt surface and filled in the remaining areas with a curvy-line, decorative feather stitch in turquoise thread. I'm only happy you can't see the quilting in the photo! It looks as if I attended the "Wobbly Fried-Egg School of Free-Motion Spirals". While intended to be symmetrical, mine are decidedly not. But I love the quilt anyway, and that's how it should be. I used almost every scrap of Bahamas Hand Print fabrics that were given to me by quilting friends on our January 2012 cruise to Nassau. So it's a meaningful quilt for me. Look... even the back of the quilt is pieced from bits of the fabric. A two-fer, lively on both sides.  


And, being a quilt gadget person, this is my dandy tool for this project. It's a marking tool called Quilt Pounce. This refillable container, about the size of a small wallet, contains a chalk-like powder. I found my kit (pouncer plus powder) at a local quilt shop.


When opened, the lambs-wool like pad is used to force the marking powder through a stencil onto the quilt top. You actually rub it rather than pounce it because pouncing produces a small cloud of dust. The powder is fairly visible on the surface, and is available in one or two other colors to ensure it can be seen on both dark and light fabrics. And it stays put. You can then stitch on the markings (ha! you can, I was only "in the ball park" so to speak) and then iron the quilt to remove the powder. Not all of the pounce products disappear with heat though, so be sure to read the package to make sure you get the iron-off kind. I believe the other type is a brush-off kind. I'm never confident it will disappear, so prefer this iron-off type. Overall, my conclusion is that important large quilt projects will continue to go to a long-arm professional, while small projects I can handle, and enjoy stitching. But I don't think I enjoy free-motion machine quilting enough to wrestle with larger quilts on my home machine, nor am I especially skilled at doing so. And I am glad to still feel good about the quilt despite the struggles, as opposed to feeling an urge to trash it and be done! It still makes me happy.