Powered By Blogger

Friday, December 31, 2010

So here's what happened...


We weren't looking for a cat, honestly. But as things sometimes happen, this little kitty found us. Jack and I each had separate plans to be somewhere else on the last day of 2010. But a truck battery problem intervened so that both of our plans changed. Instead, we took the car and our bikes to the paved bike path a half-hour from our home for a late-afternoon bike ride. Nothing out of the ordinary there. We do that quite often.

But there, in the back of beyond, near a horse trail assembly area, we saw a family with bikes pulled off to the trail side, petting a kitten. Once past, we both wondered why the kitten would be there... a remote area, no houses nearby. We were a bit worried. On our way back, we stopped to see if the kitten was still there. She was... she came running out from the underbrush to greet us. We sat on a bench with her and found her to be very affectionate, purring loudly. But she was a bit thin. We debated... what to do? We just knew we could not leave her there alone. It gets very cold at night, and there are coyotes and other possible predators in the area.

So it was decided. We would ride our bikes back to the trail head, load them up and drive the car to the horse assembly area which would take about 20 minutes. If she was still there, we would know she needed to come home with us. As we rode off, I looked back at her in the bike mirror. She looked quite forlorn sitting by the side of the trail which of course tugged at my heart. When we returned in the car, once again she bounded out of the underbrush, purring loudly.

Having nothing much in the car in which to carry her, I just held her on my lap. We were completely surprised that she showed no fear or resistance to being in the car at all! She curled up, kneaded with her paws, and just settled in for the ride. We stopped at the Dollar store on the way to pick up kitten chow and litter.


She set out to explore the house quite thoroughly, including the bathroom sink! She's a curious girl, and very loving. She seems completely at home already, and likes the sewing room. She can hardly believe her luck. Us, too... I think. As I said, we weren't really seeking a kitten. And yet... here she is. Her name is either Lily or Libby... she hasn't decided yet. Isn't she pretty?

Tuesday, December 28, 2010

Glitzy Things...

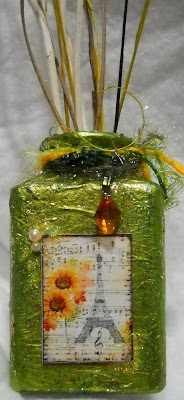
These two projects are reed diffuser bottles I made with the instructions provided at Roses on My Table, the mixed media art site I joined in November. These were fun to make, and once again I learned lots about art supplies and how to use them... and misuse them. I didn't even know the fancy reeds that soak up and diffuse the scented oils could be purchased as a stand-alone item. I'd only seen them in gift sets of diffusers. But they're available at the craft store in aisles heretofore unexplored by me. Well now I've made my own pretty gift sets!


The bird image was a freebie from Graphics Fairy, and the sunflower image was purchased as a download from Country at Heart. It's amazing to watch the how-to videos on the Roses site, which are made by instructor Christina Zinnia Gallher. I can only wish I had her skills in handling the materials. She offers many tips for making each step of the project easy and manageable. However, after I watched how to create the wired bead wrap for the neck of the bottle, I confidently set out to create my own. But before mastering the technique, I managed to shoot teeny-tiny beads all over the floor! I'm sure I'll get better at this.

Here are some close-ups of each bottle. You can see that some of those pesky beads actually wound up on the bottles where they belong. The yellow bottle still needs a charm added to the empty loop seen in the photo. I haven't found "just the right one" as yet. I chose a tangerine scented oil for a fresh, citrusy aroma.


Friday, December 24, 2010

Friday, December 17, 2010

A Cozy Cottage in Blogland...


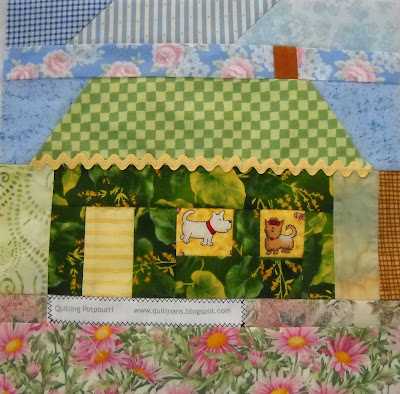
When it comes to quilting, one thing I always enjoy is the opportunity to make a single block or tow that will wind up in a quilt made from blocks by many makers. So over the years, I've contributed to a variety of raffle quilts, charity quilts, block contests, and the like. It's like having a little piece of yourself out there bringing comfort and joy to someone unknown. These house blocks are the latest of those efforts. Beth at Love Laugh Quilt came up with the idea of inviting quilters who have a blog to make a house block representing life in the friendly neighborhood of Quilt Blogland. She'll collect the blocks, put them in groups of 9 to 12, and then draw names to see who wins the blocks to make into a quilt. Participants were asked to include the address of their blogs within the house block, and the block is to measure 12" x 12". Simple guidelines. The rest is up to each one's quilty imagination. So here are my two imaginings. The blocks are due on January 1, so there is still time to make one!


Speaking of blocks and challenges, several years ago I won a quilt block challenge while on a quilting cruise. I made the blocks into a quilt called "Carribean Calypso". It was later displayed on another cruise. Unfortunately, the quilt didn't make it home from its last cruise to Alaska. Somehow, between the ship and the quilt shop where it was being sent, the quilt got lost. I still hold out hope that it will find its way back home to me. But it's been quite awhile. I posted the photo below on the Lost Quilt Come Home website. I still think about the quilt from time to time because it was so unique. It's pretty memorable with all that yellow in it! My winning block is the ship at the top of the center vertical row. And the yellow floral print by Patricia Campbell was the challenge fabric. Hopefully it, too, is currently bringing comfort and joy to someone unknown. I shudder to think of it mouldering in some forgotten warehouse in the port!

Monday, December 13, 2010

Who Wrote The Book of Santa?


I did! Well, sort of. For some time I've admired all of the creative books made by mixed media artists. And I've known that I had a book in me, too. Maybe even more than one! At any rate, here it is. The Book of Santa. This is a gift for a quilting friend who loves Santa Claus, and has a collection of Santa-related holiday decorations. She received it in her Christmas package last week, so it's safe to show it here now.

I carried the vision for a step-book like this one, using the S-A-N-T-A letters, around with me for awhile. Gradually I pictured how to sew each letter onto a cardstock base, and then add all of the various paper elements and embellishments. This photo shows the inside, page 1. I took a large plastic bin and tossed in every usable "Christmasy" thing already in my supplies, along with some purchased embellishments. So every page became a potpourri of ribbon, paper, gemstones, glitter glue, paper text, scrapbook paper... you name it.


I even tried out some new methods learned as I continue exploring mixed media. The star shown here is my attempt at a Zentangle-type design. The icicle is a scrap of fusible-backed fabric trimmed with a decorative-blade rotary cutter. And the little flower/snowflake on the left is a piece of dyed tatting. A friend from the Citra sewing and crafting group gave me a whole zip-top bag of her tatting rejects. You don't find many needleworkers who tat anymore, so the pieces were a gift.

A Dover CD of vintage images came in handy, and I had to try out the Crop-o-dial Eyelet Setter on some of the pages. Buttons and fabric text, paper shapes and paint pens... that's a mighty big plastic tote that holds all this stuff!
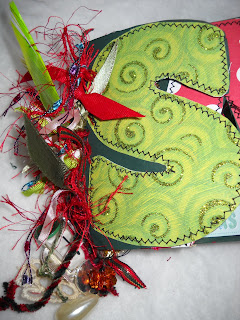
I wanted a bulky and festive fiber binding for this book, so again I gathered up ribbon, fabric strips, yarns, buttons and beads. Another friend gifted me with a bag of gorgeous feathers from his exotic birds. He found some beauties around the farm yard, and this green feather was just the one to tuck into the binding.


I found a series of charms that spelled out WISH, and added them to the binding. It seemed to fit the theme nicely... Santa is all about wishes. And the letters go well with more tatting and the pearl drops.


Every page took some thought and deliberation as well as application of the various elements. So I "built" the book over time, working on it little by little. Since this is my first book, there is plenty to learn about page composition and techniques. But I must say,this was a fun beginning.

And I heard him exclaim as he drove out of sight... Happy Christmas to all, and to all a good night! The end.

Thursday, December 9, 2010

What's Better Than Santa??


More Santas! These Santa-Boyz are now completed and are joining the first Santa I made, shown here. The three of them have traveled around the house, posing in various spots to find just the right place to hang out. The two new Santas began on the dining table, probably in hopes of a snack.


Then they found their buddy and hung out in front of the Yule Logs quilt and holiday pillow. You can't see it well in the photo, but the gold-trimmed Santa is a bit of a leaner. He may need his stuffing rearranged a little before I call him done. I love Old World Santas, and this pattern is quite simple, requiring just basic sewing skills. The pattern link is in the eariler post. Our daughter Joanna is visiting Florida for a few days from New York, and has claimed the green Santa to take home with her. So he got finished just in time to travel north. They're all under the tree right now.


There are a few more Santas like this short gold one around the house, too, helping to make it festive for the season. Joanna and I visited Epcot at Disney World when I picked her up in Orlando. The trees and decorations there also helped put us in the Christmas spirit! The tree below was a small one at our Coronado Springs hotel. It was lovely with those pink poinsettias around the bottom.


Sunday, December 5, 2010

More Christmas Fun...


I made these domino pendants as part of a project on Roses on My Table, the online art group I joined last month. Dominos! Can you imagine? I've never done anything quite like it. But Christina Zinnia Galliher, the instructor, offers comprehensive videos on the site that walk through every step. So I learned to print images, use products like diamond glaze and stamping inks, along with jewelry bails. And I hope I learned to copy the "badge" from the Roses site in case you want to travel there to explore a bit. If I've been successful, you'll see the R.A.I.L. badge to the left of this post. If not... well, I'll try again.

The images on the dominos are from the Dover Vintage Christmas Cards CD-Rom and Book. I think the most difficult part of the project was selecting which images to work with. The book has more than 200 nostalgic images to choose from. But you can see from my earlier post about the Angel Memory Box that I am pretty taken with angels. And the last post reveals that I'm partial to Santa, too. I'm happy with the results of this project, given that it was my first attempt. And I'm definitely planning to make more of these. I'm envisioning images of cats, dogs, horses, quilty things... lots of ideas.

2010 has certainly been a year of learning for me. Just three examples are creating and maintaining this blog which gives me great pleasure, mastering new techniques for creating art-style quilts, and learning several mixed-media techniques and projects. I've been able to take classes online and at quilt shops or retreats that have truly expanded my creative horizons.

I'm most grateful for the opportunities I've been given. And I very much appreciate your reading and commenting on the blog entries over the course of this past year. It's very encouraging, and I enjoy sharing the photos and stories with you. More to come... the journey continues!

Tuesday, November 30, 2010

He's the Man...


This Old World Santa was great fun to make. It just took me several years to get him done! The project went in stages. Every year Santa would surface at the top of the "in progress" pile, get a little more done, and then get put away for another year. Well, this is Santa's year! Not only is this one done, but two more are following close behind.
If the fabric print doesn't give away the age of this project, the price sticker on the pattern envelope will. I apparently bought it back in the day when patterns were $4.50. Those days are long gone. And the copyright date is 1988, so you can see I've had it for awhile. It's a pattern called "St. Nicholas Doll" by Country Appliques. Designer Jan Kornfeind has lots of Christmas patterns, and this one is still available. Well, 1988 aside, Santa is pretty timeless don't you think?


Santa was fun to embellish, and I went fishing around for all sorts of trims. I found that teeny, tiny tree that's hanging from his bell rope. It's old, too. But on the back was a teeny, tiny price tag that said $5.75. Yeah... I don't think so. I never would have paid that much for a teeny, tiny tree. It must have been part of a grab bag. And beyond all that, Santa seems to love the camera, and he begged to be photographed in a variety of settings! Since I often make a project with no clear idea what I'll do with it once it's done, I just tried out different settings and aimed the camera to see where he looks best. Here he is beneath the tree on "Yule Logs", a small Log Cabin Variation made using both wide and and narrow fabric strips. One of my favorite parts of Christmas is to be able to decorate with all of the quilts and home accents I've made over the years. They don't get out much. I'll show some more of them over the coming weeks.


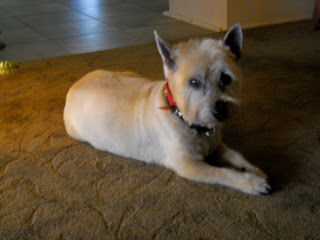
All this posing really tired Jesse out. He got a haircut for the holidays, and collapsed by the Christmas tree.

Thursday, November 25, 2010

Angels All Around...


I've recently joined an exciting and inspiring online art group at Roses on My Table. The subscription group is called Roses Art Information Library (R.A.I.L). Each month the mixed media instructor, Christina Zinnia Galliher, offers videos and how-to instructions for a project members can make. Since I'm new to mixed media, but fascinated by paper, paint, stamping, etc., this is a perfect group for me. I'm learning about art products and how to use them effectively, while making something pretty and useful at the same time. Zinnia's videos are excellent and informative. Great fun!


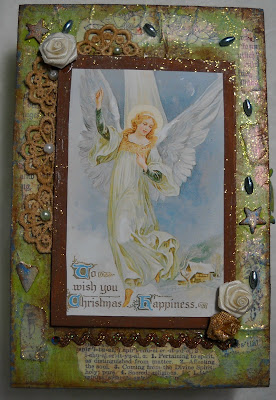
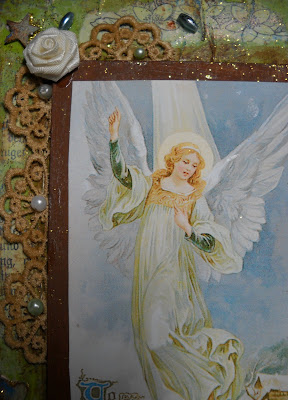
This is my first effort... a memory box. Only the outside is done so far, but I thought I'd show you that much for now. I've got so many embellishments from collecting it over the years. It's exciting to finally find a home for some of it!


I found some bits of text to go along with the angel theme of the box, and included a piece from the dictionary that defines "spiritual". Also words like "celestial" and "angelic" are placed on the surface. The detail photos may show some of this. When I took it to show my sewing and craft group last week, one of the members paid it a big compliment when she said "Oh, where did you get that old box?" So I knew it was a success, because that was the goal... to age a new craft store wood box in ways to make it look vintage. I'll move on to bigger boxes now that I have practiced on this size.

Saturday, November 20, 2010

Buttoned Up Ornament


At last I've found a home for some of those little treasures and embellishments I've been collecting for years! This nostalgic ornament began life as in inexpensive acrylic ornament from the craft store. I added bits of pattern tissue using decoupage medium. And when that dried, I added bits of text, tatting, images, buttons, beads, and yarns using more medium to adhere them. I think it has a nice vintage look with a little bit of glitz.
The ornament top was a bit too shiny, so I tinted it with alcohol ink which seemed to tone it down some. One thing I especially like about my exploration of mixed media projects is using that "someday stuff" that is tucked away all over my sewing room. And I love learning about new products and techniques. Of course this means even more "stuff"' finds its way into the space. Managing the stuff has become a bit of a task, but so worth it. I entered this piece in the Cloth, Paper, Scissors "All Buttoned Up Challenge."

Friday, November 12, 2010

Meet Luv...


She's been traveling. So have I. We're both home now. The difference is that Luv has been traveling to quilt shows. In fact a half dozen of my quilts have been visiting quilts shows that I've missed due to other commitments. So really Luv has been having more fun than me! And she earned a third place award at the Stephen Foster Quilt Show on the Suwannee River in White Springs, FL.


Anyhow, Luv was a project made using a pattern that accompanied Susan Brubaker Knapp's DVD "Master Machine Quilting", one of the Quilting Arts Workshop series. The DVD offered excellent instruction, and Luv was a fun way to practice thread sketching. Of course embellishing her was the most fun of all.

Wednesday, November 3, 2010

Twin Dolls for Children in Need


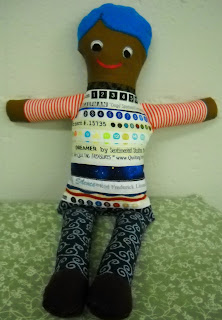
Meet Belinda and Bo. They are two more dollies I made for the Dolly Donations drive. Belinda's dress is made using some of the Urban Landscapes fabric I won this summer. It was a prize awarded on designer Kathy York's blog. And Bo's shirt is pieced from assorted fabric selvages. You can find all sorts of crafty and sewing uses for selvages on The Selvage Blog, published by Karen Griska who is the author of "Quilts from the Selvage Edge" (AQS, 2008). I've been saving selvages for awhile, and thought this was a good place to show some of them off and give Bo a one-of-a-kind shirt.


The first donation doll I made some months ago is shown in this post. And these donation dolls were also made to send to the dolly drive intended for children in Haiti through The Abundant Gound Foundation. While this is no longer an active drive, there are still opportunities to contribute dolls in a variety of ways, and by organizing your own dolly drive for a charity of your choice. You can learn more and get the free pattern to make donation dolls for a good cause at Dolly Donations. Although Sarah is changing the direction of her dolly donations site, you'll find helpful how-to tutorials and free patterns on her site.

Monday, November 1, 2010

I Hear a Symphony...


I made this small "Symphony" quilt using applique and machine techniques from quilt artist Gloria Loughman's book "Quilted Symphony" (C&T Publishing). It has some intricacies, but I enjoyed the methods and thought the results were pretty good.


Our Country Road Quilter's Guild show is this coming weekend- Friday and Saturday- at the CFCC campus in Ocala, FL. I had forgotten that I entered this quilt back in early September and had set it aside, incomplete. When I got a list of my entries, I hurriedly pulled this project from the stack and finished it up. It only had a little quilting and the binding to go, so it did not take long.


The befuddling thing is that I had meticulously made a list of the quilts I entered in the show at the time of submitting the forms. But as things go, I could not find my list!! Often my mind seems as chaotic as my sewing room. But eventually things unfold as needed.


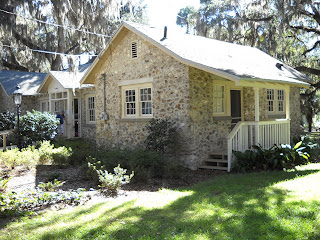
And over this past weekend I had a chance to visit another quilt show in our area held by the Anthony Quilt-and-Go Quilters. They used this charming community center building in McIntosh for the show, and it was a beautiful fall day. The grounds alone made the trip a treat. Add in quilts, and it's a perfect event.


Wednesday, October 27, 2010

BOO!!


Scared you, didn't I? Relax, it's just a pin cushion. But take a look at these little Halloween banners, below, made by Norma on our recent quilting retreat. Aren't they cute?


And speaking of spooky things, there is quite a story behind the rather large pile of thread, shown below. It was a dark and stormy night... Oh, no, that's a line from a book. Actually we were at the quilting retreat, but it was late at night. I crossed the room to deliver some blocks to a pile of charity quilt blocks. As I walked towards the pile, I was "clothes-lined" by something gossamer thin and cob-webby feeling. I pulled at my neck, and Jean, another guild member noted something extending along the room at the same time.
She followed it one way, I went another. I located the source of this cob-webby thing... it was Norma Jean's sewing kit! Apparently when Norma Jean left the sewing room headed for her dorm room, the thread she was using attached somehow to her person and trailed her for hundreds of feet, all the way to her room.
We pulled and pulled, and this is the resulting tangle of thread we retrieved. Must be worth about $5! So we put it by Norma Jean's sewing table, and Jean added a sign that said "Please detach all threads before exiting the building." Norma Jean said she felt "something" on her, and brushed it off at the door of her room. Well we recovered that "something" and here's a photo to prove it. We had a lot of laughs over this, and everyone agreed you couldn't make it happen if you tried.


Happy Halloween.

Monday, October 25, 2010

On the Quilt Retreat...

I finally got these batik Drunkard's Path units assembled.
They still need a border and something more... but at least they
are this far along.

Every time I prepare to go on a 3-day quilting retreat held by my local guild a couple of times a year, I ask myself why I thought this was a good idea. It feels as if I'm packing up my entire sewing room to take with me. Actually, we kind of do that! But once I'm there, I'm always glad I made the effort. For one thing, it's a chance to move along some of the many, many, many (you may think that's too many "many's"- but not for my projects!) works-in-progress. And it is so inspiring to see the wide array of projects my fellow stitchers are working on. Several of them are pictured here.


Victoria's traditional Lone Star in
non-traditional colors! She used
the Quilt Smart foundation method.

Jean's repro-fabric Nine Patch. Love the border.


Karen's b&w Basket quilt.
She used an Alex Anderson pattern
and  kit of fabrics.
 
Someone always has a new quilting technique to show us, and the fellowship is most enjoyable. There is something very soothing about the industrious hum of sewing machines, and we had more than 15 of them humming along at once. And the best part is that we have nothing to do but sew. Delicious meals are provided for us at the church-sponsored retreat center. The beautiful grounds and sunsets are a bonus!

Monday, October 18, 2010

This Little Light of Mine...


This small holiday quilt (9 1/2" x 12") was made using the "Christmas Candle" pattern from Bee Creative Studio. With fusible applique and machine quilting, it was quick to sew and will make a cute seasonal wall hanging. There are 3 other designs in the series- a Christmas tree, snowman, and the gingerbread man.


It constantly surprises me how quickly the time flies by. Here we are more than half-way through October. So that holiday sewing needs to happen now if I'm going to be ready at Christmas!

Thursday, October 14, 2010

Virtual Studio Tour


Cloth Paper Scissors is hosting a Virtual Studio Tour October 15-17, and members of their online community have been invited to join in. So, welcome to my work space!

We moved to Florida in 2001, and I commandeered one of the bedrooms to become my creative space. On the west wall, above, we had a closet company build in this computer work station, book shelves, and storage area. It's so convenient. And I use the area to display some of the small projects I've made or been given.


On part of the north wall is the sewing station, above, that houses my Bernina 440 QE, thread storage, and more books. My little Featherweight is hiding in there, too. I need to get it out more often. For some reason, the Featherweight intimidates me! Note the red mesh pop-up laundry tote. I used those to store works-in-progress and to carry things to classes or quilting retreats. I just got back from one, so it's full of things I worked on.


Adjacent to the sewing area is the pressing area, above, and more cabinets for supplies. The top of the cabinet is just right for display of more small projects. And there is wall space for quilts and other hanging projects. I made "The Wet Dog" quilt in a story quilt class with Mary Lou Weidman. And the fabric-paper bird strand was one I received in an exchange during the book study of "Stitch Alchemy" by Kelli Nina Perkins. The large rolling table is a cutting area and a "catch all". Things pile up there until they get put in their proper places, or until I'm ready to clear the surface for use.


On the east wall, above, is more storage for magazines, and a large glass-front quilt display unit. I have a small collection of vintage quilts as well as some I've made in there.


Half of the long closet on the south wall, above, I call the "staging area." Projects waiting for their binding or to be machine quilted or embellished reside there. And completed small quilt projects hang on the rack on skirt hangers. More mesh laundry totes are pressed into service to hold works-in-progress and various papers, stablilizers, and fusibles. Paper storage is also located here.


The other half of the closet houses the fabric stash and batting. I'm as happy as can be in my studio, and happy you stopped in for a visit. I have an extra machine if you'd like to stay awhile!