Powered By Blogger

Monday, May 27, 2013

Making it Modern...

One of my favorite things about our quilt guild is the opportunity to delve in and learn more about every aspect of quilting. We were fortunate to have two very talented representatives from The Modern Quilt Guild visit to tell us more about this current direction in quilting. Lora Douglas from The Modern Quilt Guild of Gainesville and Linda Hungerford, from The Villages and Central Florida Modern Quilt Guild, gave an in-depth power-point presentation followed by a show-and-tell of some of their quilts. You can click on their names to visit each of their blogs. The piece shown above is the back of one of Linda's quilts. Lively, yes? And it features a few leftover blocks from the front, shown below. One very interesting feature of their presentation was a timeline with photos illustrating the growth of the Modern Quilt trend over the past decade or so. We also learned about the elements that define the Modern Quilt style. Lora has written more on this topic on her blog.


Improvisational curves behind the lattice-like grid give this quilt a depth of perspective. Both presenters noted that they share a goal of working toward a more relaxed approach to free-piecing. And since the Modern Quilt Guild had its origins in online communities, it was quite in keeping with the tradition that these two quilters collaborated on their presentation via computer. This was only the second or third time they had met face-to-face! And their program was seamless (pardon the pun)!


Lora described her progress in sewing Modern Quilts by showing us three different versions of this original design she entered in a quilt magazine contest (where it earned second place). Her first two quilts looked too traditional to her, and she felt one lacked contrast. But she persevered and this graphic quilt was her final version. You can see the pile of Modern Quilt books on the table. Linda and Lora provided a comprehensive book, blog, and website list for us as well. What an enjoyable and enlightening evening!


Friday, May 17, 2013

A Finger in Many Pies...

I could hardly believe how long it's been since I posted on this blog! We've been traveling and had some family visits, and I was not getting a lot of sewing done. That needs to change. So I started with a couple of blocks for our guild's Christmas-themed donation quilt. It's not enough to make blocks for my own quilts, I just love being part of quilts made by group effort! This 12 1/2" Star  block will be one of many assembled into a cheerful holiday quilt.


This is the first block I made, but was disappointed to find it came a scooch short of the required size. You know a scooch- just a little less than it should be. I may try this one again just because I like the Missouri Star block. Any errors happen in either the cutting, the piecing or the pressing so I just need to figure out where I went wrong and fix it for the second time around! I suspect the piecing because I was careful when cutting and pressed the daylights out of it using spray starch. We'll see.


But because I can't stay out of other people's quilts, here's another small project I'm working with a quilting friend to complete. Someone gave her these cute red work blocks, beautifully stitched, and she asked for ideas on how to use them in a baby quilt. Since they already have a layer of batting through which the embroidery was done (no floss shadowing through), I thought it would be good to do a quilt-as-you-go quilt. So we've pieced some alternate string blocks and will assemble them with borders eventually.


This quilt is one I made for a special donation to a military service person who had lost his sight. It's a texture quilt and has dimensional pieces to feel such as zippers that open, prairie points with buttons, braids and trims, tucks, and plushy fabrics.


As the thought of "a finger in every pie" crossed my mind, I went in search of other quilts I've been a part of. I'd almost forgotten this small Cracker Quilt our small Wednesday sewing group pieced some time ago. It's fun to think that a little piece I made combined with others and is warming someone's life somewhere. Guess that's part of the community and sharing that draws us to quiltmaking.


Sunday, April 7, 2013

The Perfect Quilty Road Trip...

Wanting to make rapid progress on this redwork quilt after spending what seemed a lifetime completing the embroidery, I needed a red print for a narrow inner border. That mission coincided with an invitation from The Old Sewing Machine Man to join them on a visit to Cinnamon's Quilt Shoppe in Jacksonville, FL. Johnny Johnston will be teaching his class on the Featherweight machine at the shop, and he and wife Debra wanted to time the drive. Naturally there were quilters who were willing to "help" by riding along. So 6 of us spent a fun day, and I found the fabric I needed. This quilt WILL get done. Inner and outer borders to go, and then quilting.


The shop is delightful. It's been established for about two years, and in that time has developed into a large, well-stocked resource for quilters. There are rooms off of rooms, and each one is filled, like this one, with bolts of fabrics in a variety of styles and colors, patterns, and notions. Lots of samples help inspire shoppers, and the classroom is large and well-lit.


Shop worker Janice was busy and happy cutting fabric, and I had to take photo of these lively new arrivals. I found the Christmas print shown below to use in  Missouri Star- a block I'll make for our guild's opportunity quilt. It has just a bit of gold sparkle in it. The pattern is Prairie Moon's tutorial from My Favorite Block Quilt-Along. Of course I bought several more fabrics, and a handy needle threader. Fabrics and quilting gadgets are just too hard to resist! We followed up the shop stop with lunch at The Metro, which we all wanted to visit having seen it on "Diners, Drive-ins, and Dives". I always say I'd have loved having Guy Fieri in my class when I taught 7th grade. He's such a live-wire now I can only imagine him in Middle School. We enjoyed the food, and the entire day! 


Monday, April 1, 2013

A Little Mindless Creating...

It's not as though I didn't have enough projects underway. And it's not as if I don't have enough quilt books already. But after paging through, and then giving Bethan Ash's "Vibrant Quilt Collage" as a Christmas gift, I knew I needed to order a copy as a gift for myself! What I like about the book is that it's loaded with page after page of inspiring and innovative collage quilts. Plus it has instructions for fusing, free-cutting, and layering fabric shapes to create spontaneous quilt compositions. And lastly, directions to add stitching for a final layer of texture and embellishment. This piece resulted from "Exercise 1: Using Simple Shapes." Yup- they're simple all right. And they made for a fun afternoon of flexing the creative muscles. Rummaging through my thread collection to see what I might like to use was enjoyable.  The stitching is just soothing. There's just something about the hum of a sewing machine that puts me in "the zone." So I look forward to trying more of the exercises in this book. What to do with the small pieces I finish? I think they'll make useful small bags like the Snap Bags quilting friend Robbie makes. She even sent a link for an instructional video, so when I'm ready to use them, they'll have a home.  


Tuesday, March 19, 2013

Let there be Geese!

Lots and lots of Flying Geese units are needed for a redwork project that's in progress. And there are lots and lots of methods for piecing the units accurately. For the first batch, I tried the the method in which you make two units at once. But for the second batch I used the method we just practiced in Kim Diehl's class at quilt guild. Her instructions are for a stitch-and-flip method using squares and rectangles. She gave us several tips for sewing the units successfully.


One useful tip was to adhere this narrow tape to the bed of the machine to provide a stitching guide for sewing an accurate diagonal seam across each square. You can see in the photo above, that by watching the point of the square and keeping it aligned with the tape, the line will stitched in just the right place. She also suggested starting at the center point, as above, to keep the machine from "chewing up" those corners. Once sewn, you can flip the triangle back on itself and press, and then trim away the bottom two layers to reduce bulk. But just in case your brain goes on a mini vacation while sewing, and the unit is not accurate, she suggests just trimming out the middle layer of the triangles. Doing this preserves the cut rectangle and keeps the unit precise. That happened in the unit at the upper left in the top photo. You can see a sliver of the red rectangle peaking out where I stitched slightly off the true diagonal. I like this method because it keeps the unit from becoming distorted or wonky, as we quilters like to say.


All those Flying Geese units, plus many more, are going to border these three panels of redwork. At long last I completed all three panels. I'm glad I saved the one below for last because I knew it would skim right along and that the hard part was behind me. It may not look like a lot, but every branch, every stone, every fence post and snow line, every bit of horse tack is embroidered with two strands of floss. It seemed as if I'd never get there!


And now that these are done, the remaining task is to sew them in rows with pieced blocks like those seen below, and then border the whole project with the geese. Oh yes, and quilt it (or get it quilted). So I'm still a long way from done, but it is a Christmas quilt and I have some time. The pattern is by Crab-apple Hill, and the quilt will finish to about 51" x 57". Meantime I'm celebrating completing the redwork, and I'll keep you posted on the finish line!


Thursday, March 7, 2013

True Grit...

That's what I've been cleaning for awhile... grit. I noticed it's been several weeks since I last posted, and I reflected on why that is. One word answer- remodel. We've had contractors camped out in our home ripping and re-doing one bathroom and tiling the other. So I have done little but putter and await the completion. They're gone! And I like what they did very much. But now I'm cleaning the "mud" and debris left behind in prepartion for painting. It feels like my life was on hold. But one thing I did was to take a class at guild on making this handy iron caddy. If you've ever seen the tell-tale imprint of a hot iron on carpet, you'll know how useful this project is going to be. At the end of a class or retreat, no hanging around while the iron cools enough to safely put it in the car. This caddy can take the heat!


It's made using layers of fabric, batting, heat resistant insulated fabric, and silver ironing board fabric. Here it is pinned and ready to stitch. A plus is that it also makes a pressing surface when it lies flat like this.


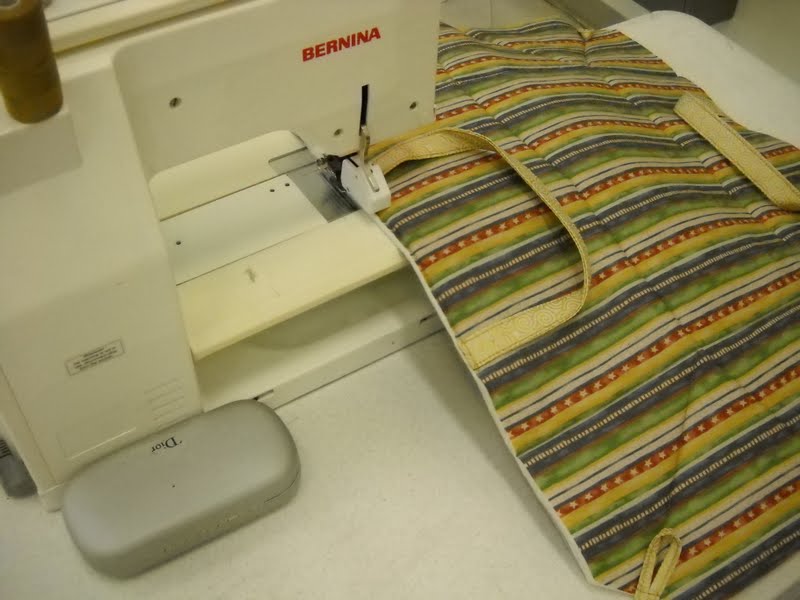
We used a walking foot because the layers are quite thick. I'm glad to have this handy tool, and our instructor did a great job walking us through the project. Our guild also had teacher Kim Diehl visit for a trunk show and class. Those little star blocks in the first photo are about as far as I've gotten with her project, but her machine applique methods are excellent so I hope to use them for other projects, too. I did other things during the remodel, too, like making binding and some sorting of "stuff" in the sewing room. My sewing therapy helped ease the turmoil of the remodeling, and I think we have everything updated in the house that we want updated for now.


Tuesday, February 12, 2013

How Sweet it is...


Happy Valentine's Day! This seasonal printed panel is one that has lurked in my sewing room for a couple of years. So I decided to practice my free-motion machine quilting on it and make a special occasion wallhanging. I find that these kinds of projects are no-pressure ones for me. They are inexpensive enough that I'm willing to experiment on them, and small enough to not require a big time investment. So I covered the panel with meandering hearts, outline quilting, and even tried my hand at writing words with free-motion. I experimented with different threads to learn more about tension, and tried out a fully machine-applied binding. It was a challenge to catch the corners in the stitching, and I had to add a few hand stitches to secure them. But overall, it was a fun little project. And the panel has several cousins waiting in the closet for their turn at completion... not all Valentine's Day, but just colorful panels I could not resist!


And speaking of lettering, I've been trying my hand at free-pieced letters. I've seen the "Word Play" book, and there are various tutorials online for improvisational pieced letters. But in the end, I found the puzzle-like approach to inventing the piecing for each letter to be really intriguing and enjoyable. I used a variety of strip sizes from about 1" to 2" cut width, and wider ones for the fill pieces as needed. It occurred to me that "puttering around" in the sewing room and doing things like this is really satisfying for me. This may explain the numerous unfinished projects, stray blocks and quilt parts that occupy space here. I think Gwen Marston and Freddy Moran call this kind of thing "The Parts Department" in their book "Collaborative Quilting." I've got lots of parts! These letters will eventually get sized so they work well together and have an eventual home.