skip to main |
skip to sidebar
 A box full of batik scraps, a drawer full of fibers and beads, and a yen to sew something small yielded several new book covers. The pattern pieces are simple- just freezer paper cut along two gentle curves, pressed onto fabric, cut out with a slim seam allowance, and put back together on a batting base. Then comes the fun part, quilting and embellishing. I plan to keep one, and donate the others to an organization for a fundraiser.
 One challenge I find in embellishing the seamlines with yarn is how to attach it in order to keep the fuzzy fibers loose. I wanted to couch it down by machine, but no matter how I adjust the stitch, the yarn just winds up looking restrained like it's been placed in a straight jacket. So I decided to just couch the yarns by hand. The seams are not so long that it's tedious, and I much prefer the free-flowing look of those loose fibers.
 This may be the book cover I’ll keep. I like the rusty tones and discovered some great beads in my collection to enhance it. I also used bobbin stitching to quilt the metallic thread in the lower section. By the way, I photographed these on some “under paper”. That’s the newsprint placed under painting projects to blot, roll off a brayer, or off-print a stamp. I learned about it in mixed-media classes with Roben-Marie Smith, and I’ve gotten so I’m as happy with the under paper as I am with some of the projects! More about that in an upcoming post.
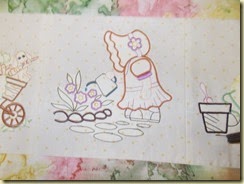
 This little sunflower piece was a sample made in an applique class some years ago. What do you do with those sample bits? They’re too pretty to throw away, and yet too small to do much with. So this one found a home in a book cover. At least it’s out of the storage drawer!
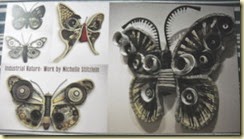
 This weekend I had a chance to visit the local Appleton Museum to see an exhibit of woven tapestries (astonishing colors, detail, and expressiveness in some very large pieces). One well-know weaver had a quote which said “Tapestry- the dream we hang on our walls.” I was not able to take photos of any of the hangings, but if you look for Appleton Museum on Facebook, their photo gallery shows most of the pieces. Another exhibit is also on display until next weekend. It’s called “Industrial Nature: Work by Michelle Stitzein”. I took these pictures from the promotional postcard and brochure to give you just an idea of the display pieces. The butterflies are created from found objects like sink strainers, piano keys, computer mice, gas caps, pipe fittings, license plates, you name it! And the second photo is a very large piece fashioned from hoses and cables. I just cannot imagine the storage issues she faces to have her materials at the ready! And I think my workroom is bad. But the pieces were just fascinating. Take a look here for some better images of her amazing work, if you like recycling in art.
 I’ve been on a paper tear for a couple of weeks now. That means little sewing and lots of messy paints, stamps, glue, and inks. It’s great fun. First I put a toe in the water of an online art journal project called The Documented Life. Each week participants create a spread in a book that's part daily minder and part art journal. Spreads are based on prompts provided by the organizers. One of them was to include an image of my front door which is where I began. The group is on week 22, I’m on week one. But we all start somewhere, right? It’s exciting to give this a whirl. We’ll see where it goes.
 And I can hardly watch a YouTube video on paper projects without grabbing some paper and giving the technique a try. That’s how I wound up with these two fancy-fied pocket envelopes. They began with a 12” square of two-sided scrapbook paper. They’re embellished with tiny flowers, jewels, press-ons, and ribbons.
 Next I dove into making various collage-style envelopes and portfolios. Some have machine stitching on them, so they count as a sewing project in my book.
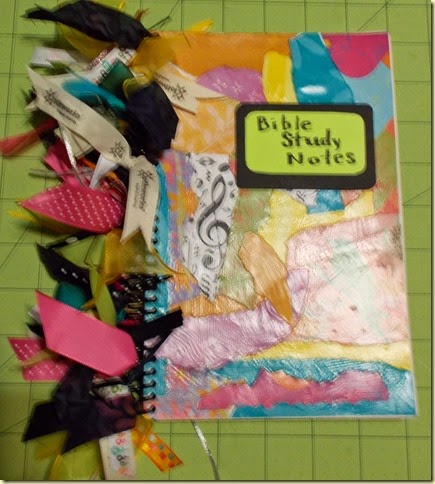
 And finally, I made a Lollapalooza Journal in an online class with artist Martha Lever. I decided to use it for notes from another online class with Bible teacher Beth Moore. Martha’s project really made a dent in my ribbon and fiber collection as the spiral binding got finished off with all manner of ties. I must say I’ve never met a journal I didn’t like, so am amassing quite a nice collection of handmade ones. I tend not to write in them much however. Need to work on that. Paper projects create as many, if not more, scraps as quilting does, so I’m knee deep in scraps. Happily so, though!

This vibrant lovely has been languishing in a drawer just waiting for the day when I would find a way to make use of her. I made the face in a class with Yvonne Porcella called “Jewelie” where she taught a fusible method for making freeform images. At last I decided to use the piece in a sewing machine cover just to give her a new purpose and outlook on life. She’ll keep dust off the machine while it’s idle, and she’s got a great view of everything happening in the sewing room. Even though there are several quilt projects waiting in the wings, I’ve popped the top onto the machine and I’m off working on paper projects. As if managing fabric and quilting supplies wasn’t enough, I’m dragging paint, paper, punches and more out of the closet! I think this charming lady needs a name. She’s Carmen-Miranda-like, but I’m blank. Any ideas?
 I’m a big fan of online classes, especially mixed media ones. Now that we finally got DSL in our rural area, after a 13-year wait, I’m discovering many more videos and classes I can access and enjoy with no data limits. One instructor whose work I’m drawn to is Roben-Marie Smith. I signed up for her "Ripped and Stitched" workshop and made this journal, complete with inky and painted fabric strips, and sewn-in pages. It was great fun to assemble, and I learned a lot about mixed media techniques while making it. Pardon my camera skills- the front label doesn't really go downhill quite as badly as it looks in the photo.
 This photo gives a view of Roben-Marie's unique ribbon binding method for putting the pages into the book. It was quite easy, plenty sturdy, and not a method I’ve seen before.
 Inside the journal are a dozen catalog envelopes gelli printed with acrylic paint, stitched and folded into pages with pockets. I had not tried the Gelli Plate before either, and I like the messy fun and surprise results of it. This journal could lend itself to a year-long effort with a page a month and a place to store memorabilia. While I love to make journals, I’m less inclined to write in them. But I’m trying to get better about that. That’s another whole post! Meanwhile, I’ll just keep ripping and stitching!
There are so many great things about time away at a three-day quilting retreat. Let me share just a few of them here. First, there’s plenty of table space to lay out and arrange blocks for a quilt project. This one is my version of “Stash Attack”, the free pattern offered by National Quilting Association (NQA) for National Quilting Day. This project was easy to cut and sew, and it made a good-size dent in my fabric scraps, which is always a plus. I got the top sewn and ready for quilting while at the retreat a few weeks ago.
 There’s no shortage of scrappy fun at a retreat. The strips above are the start of a ScrappyTrips quilt made using Bonnie Hunter’s tube method of sewing blocks. And I learned there is yet another Pineapple ruler! So far I’ve seen four different ones. This one looks like it resulted in an accurate block. All those small triangles in the project below are eye-catching, too.
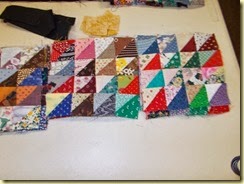
 This is a striking kit quilt that made interesting use of the medallion fabric. It got hung up on the “done wall” early in the retreat. Below is a bright Jelly Roll quilt. Cute, simple, and so appealing.

While everyone hauls their sewing machines and, it seems, practically the whole sewing room, several of our group members brought hand work projects. I loved seeing this One-Patch triangle quilt being hand quilted with Big Stitch.
 I always get lots of ideas from my fellow quilters. I love how the machine feather stitch looks for quilting this bright and lively quilt. It really adds a nice accent. I’ll file this idea away to use sometime.
 Several years ago I participated in a “brown bag” row quilt exchange. I assembled fabrics I wanted in my project, made one row of the quilt, and put the row and the fabrics in a bag to be passed along, one by one and month by month, to seven other quilters. At the end of the project, we held a reveal party where we got to see all the rows made for each quilt together. I love my rows, shown below, and yet back in the bag they went where the languished. Finally I got them out and sought input from others on how to assemble them. So this project moved a bit closer to completion. Many of my quilts make more than one trip to retreat before they reach the finish line!

 When it’s time to take a break from stitching, a stroll around the workroom is just the ticket when there is this much eye candy to feast on! Even though I whine a little when I’m packing the car for retreat, I’m so happy when I’m there. And I’m so impressed with how much work everyone gets done when there is nothing but sewing happening.


Ah the quilt life!
 Here are a few additional photos from the Chihuly in the Desert exhibition at the Desert Botanical Gardens in Phoenix. What the artist can do with glass is truly astonishing. And then there is the placement of the pieces, which is an art in itself.
 I didn’t get all of the glass sculpture names. My husband Jack was obligingly listing them as I took the photos. But quite often we got lost in the looking and did not jot them all down. This spectacular piece was almost hiding among the succulents in the Desert Loop Trail. Wouldn’t you love to have watched as these were being transported and installed? What a monumental task.
 I found these Jade and Crimson Thorns oddly compelling, and the title sure says it all. That’s a dead Saguaro Cactus lying behind them. I’m not sure what you call that… a carcass? No, I don’t think that’s it. A skeleton? Yes, maybe that’s what they’re called.
 As dusk fell, the sculptures were lit. This was taken when it was just getting toward dusk. Scarlet and Yellow Icicle Tower mimics the Saguaros in the background. There was also a line of colorful glass ascending the hill, but it was almost impossible to capture without blurring the shot.
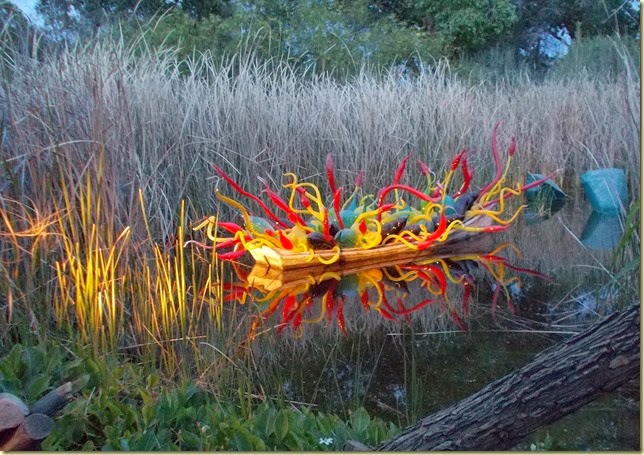 We had to backtrack to view some of the glass after dark, and this Sonoran Boat was one I did not want to miss. Fiery and beautiful!
 In looking back at the photos I took, I’m surprised at how many I was able to shoot without getting lots of the crowd in them. The exhibition was packed, as you might imagine.
 And lest we forget.. not everything that took my breath away was man-made. Here are a couple of pictures from the Sedona Red Rock area. At every turn there is yet another magnificent landscape. I never tire of looking.
 I’m going to get back to quilting, journal making, and paper crafting now, but I did want to share these photos. And I’m filled with inspiration and gratitude after soaking in all this beauty!


